Error Message
If you receive an error message, it will indicate what is preventing registration in the top right-hand corner of your screen. If you need assistance, you can always contact your faculty/college advisor to discuss how to best address the error message.
Adding Wait Listed Courses
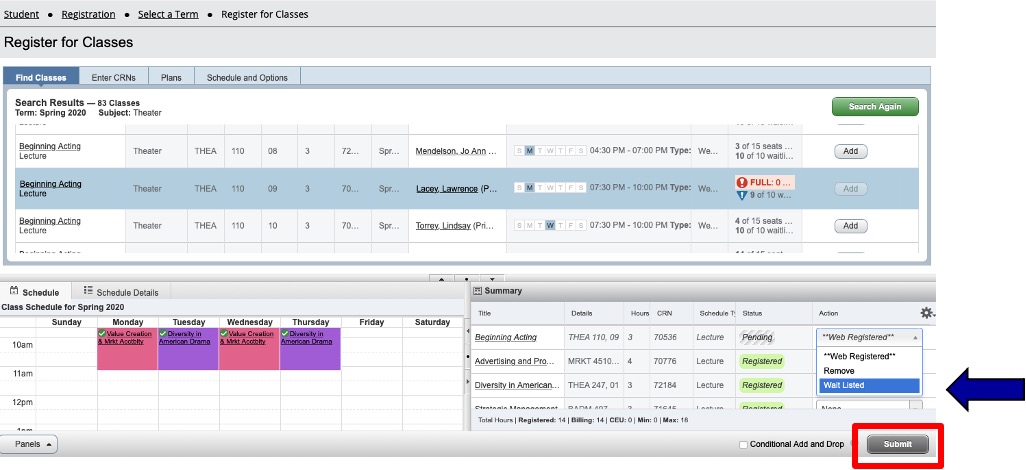
If a course is full, but a waitlist is available (not all courses have a waitlist feature), students can add themselves to the waitlist while the course status is still “Pending” by selecting “Wait Listed” from the dropdown menu under “Action.” Be sure to click “Submit” to complete the transaction.
A few tips about waitlisted courses:
- If you decide to put yourself on a waitlist for a course, please be sure to enroll in another course as a back-up option because there is no guarantee that waitlisted students will be able to register for a closed course.
- Regularly check your Lion e-mail for waitlist notifications as any changes to your waitlist status will be sent there
Checking Your Position in a Wait Listed Course
Step 1: On the Registration Page, please select the "Schedule Details" tab
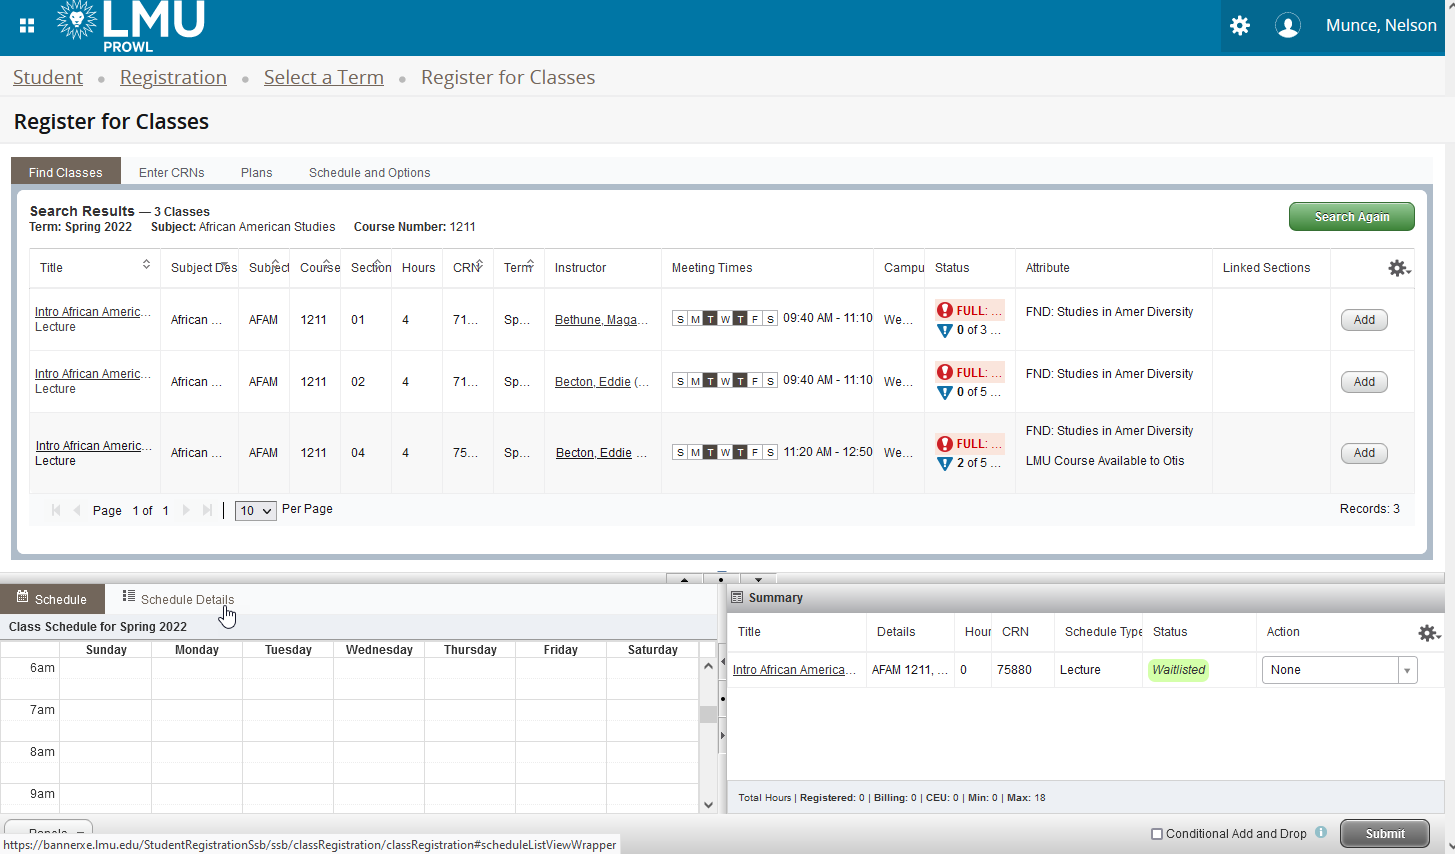
Step 2: Please select the "triangle" icon next to the title of the course in order to see additional details about the course
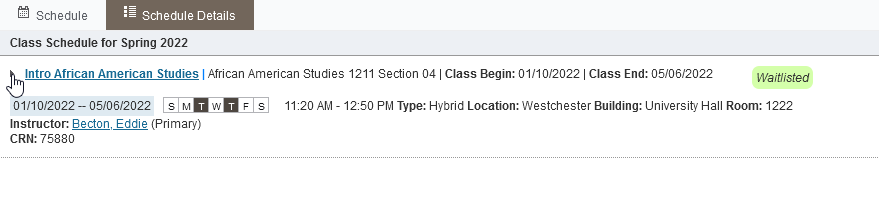
Step 3: Your position on the waitlist will appear next to "Waitlist Position"

Again, please regularly check your Lion e-mail for waitlist notifications as a seat can become available at any time before the “Last Day to add or drop a class without a grade of W” for the term you are registering for – see the academic calendar for the specific date.
Moving from Wait Listed to Web Registered
When a seat becomes available in a waitlisted course, students will receive an e-mail to their Lion e-mail account indicating a deadline to either add the course in the Registration Interface or be dropped from the waitlist if no changes are made by the deadline.
If you are notified of getting a spot in a waitlisted course, log back into the Registration Interface and follow these steps:
- Select “Register for Classes”
- Select the desired term from the dropdown menu
- Change the dropdown menu option under “Action” from “Wait Listed” to “Web Registered”
- Click “Submit” to complete the transaction
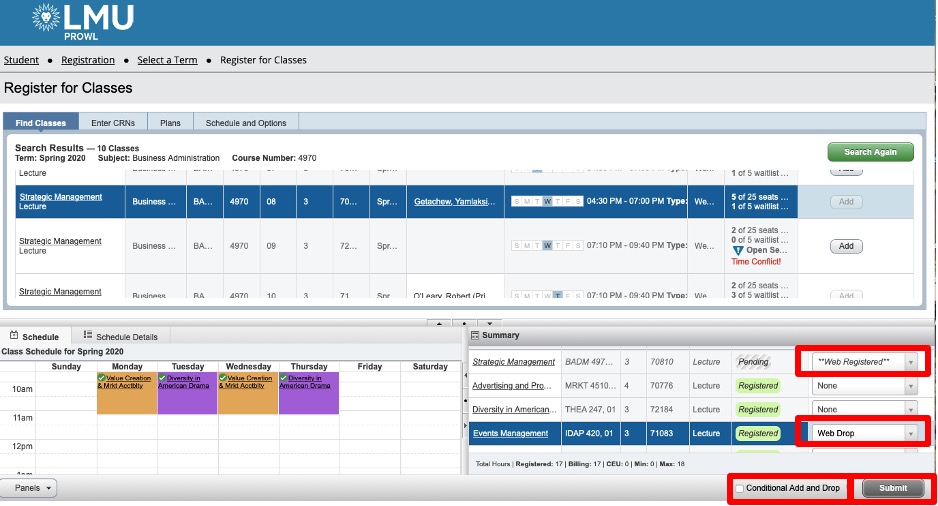
Finalizing Schedule (Adding/Dropping Classes)
When making the necessary changes to your “Course Summary,” you will want to ensure that adding the waitlisted course (or any course) does not put you above the maximum 18-units allotted by the system.
If you need to drop a course from your “Course Summary” to add an accepted waitlist course (or any course), you will want to do the following:
- Indicate under “Action” which course you will want to drop by selecting “Web Drop” in the dropdown menu
- Indicate under “Action” which course you will want to add by selecting “Web Registered” in the dropdown menu
- Check the “Conditional Add and Drop” box (next to the "Submit" button) to ensure that you will only be removed from your current course if you can successfully enroll into the waitlisted course (or course you are trying to add).
- Click “Submit” to complete the transaction (be aware that once a course has been dropped, it will immediately become available for other students to register for it)